DIY Thanksgiving Décor - Apple Votives
The Overview
Looking for an inexpensive, VERY easy way to add some style to your Thanksgiving tablescape? We were too and were inspired to create Apple Votives for our Thanksgiving table this year. Hosting at our home, we like to make everything personal and cozy. The décor is a huge part of that and this year we had fun trying out a few new projects.
Skill Level - Beginner
Time Commitment - Approximately 5 minutes per votive.
The Tools & Materials
Tools
Planning Tools
Dry erase marker
Building Tools
Paring knife
Spoon
Scissors
Materials
Apples
Votive candles


The Steps

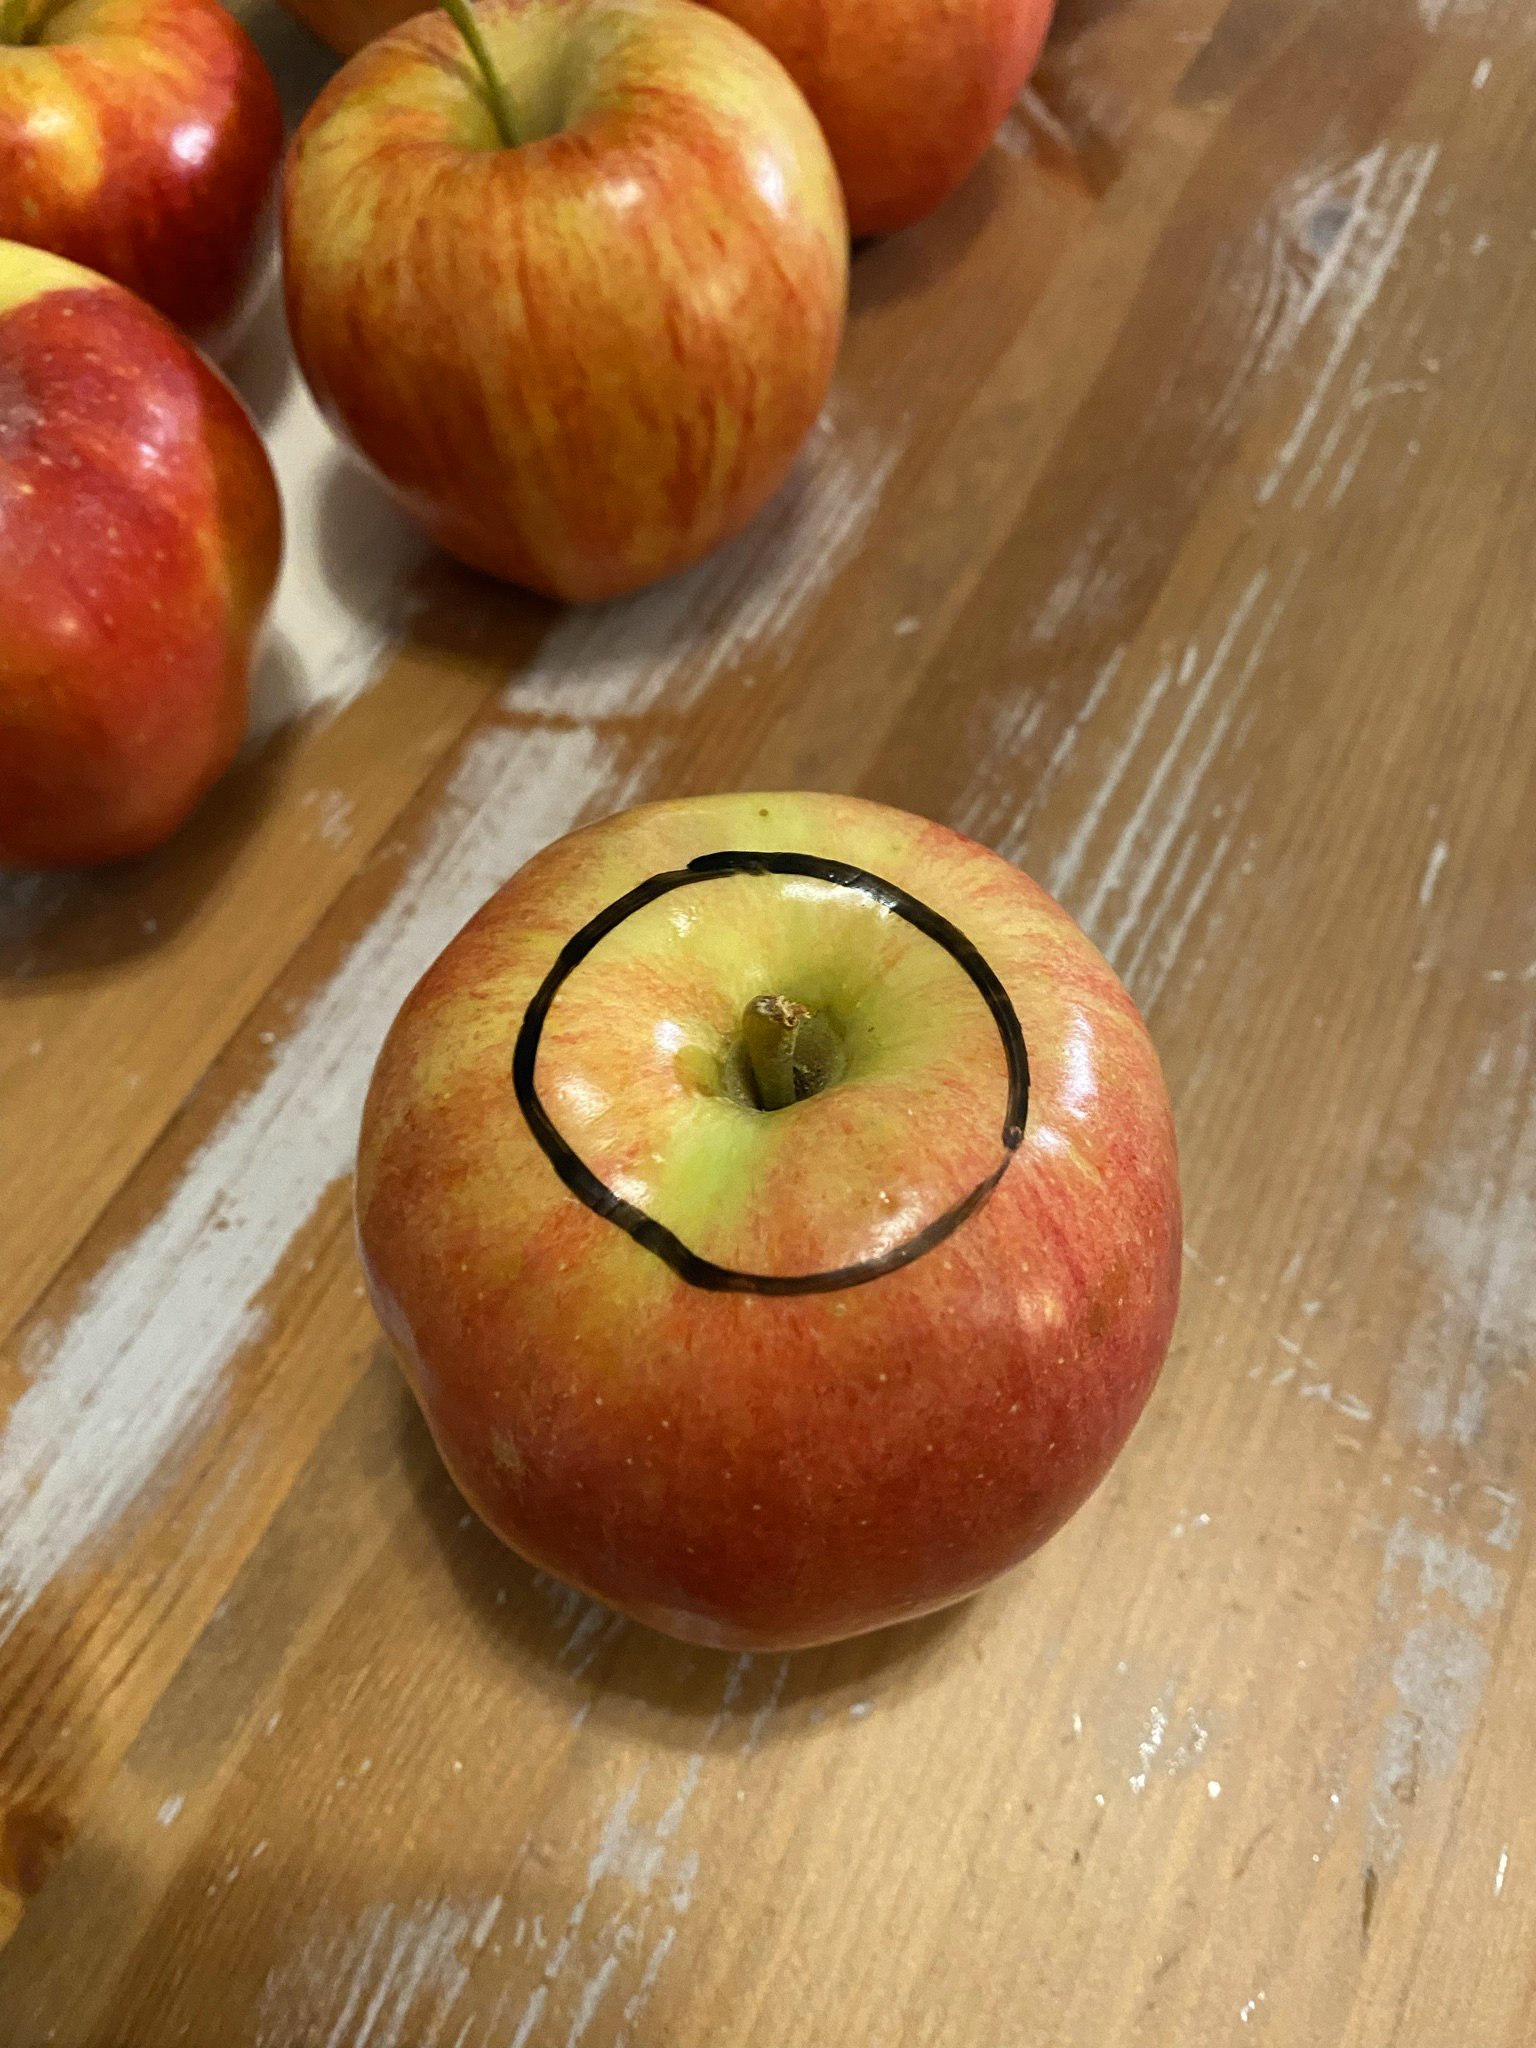
Step 1
Center a votive on top of the apple.

Step 2
Use the marker to trace the shape of the votive.
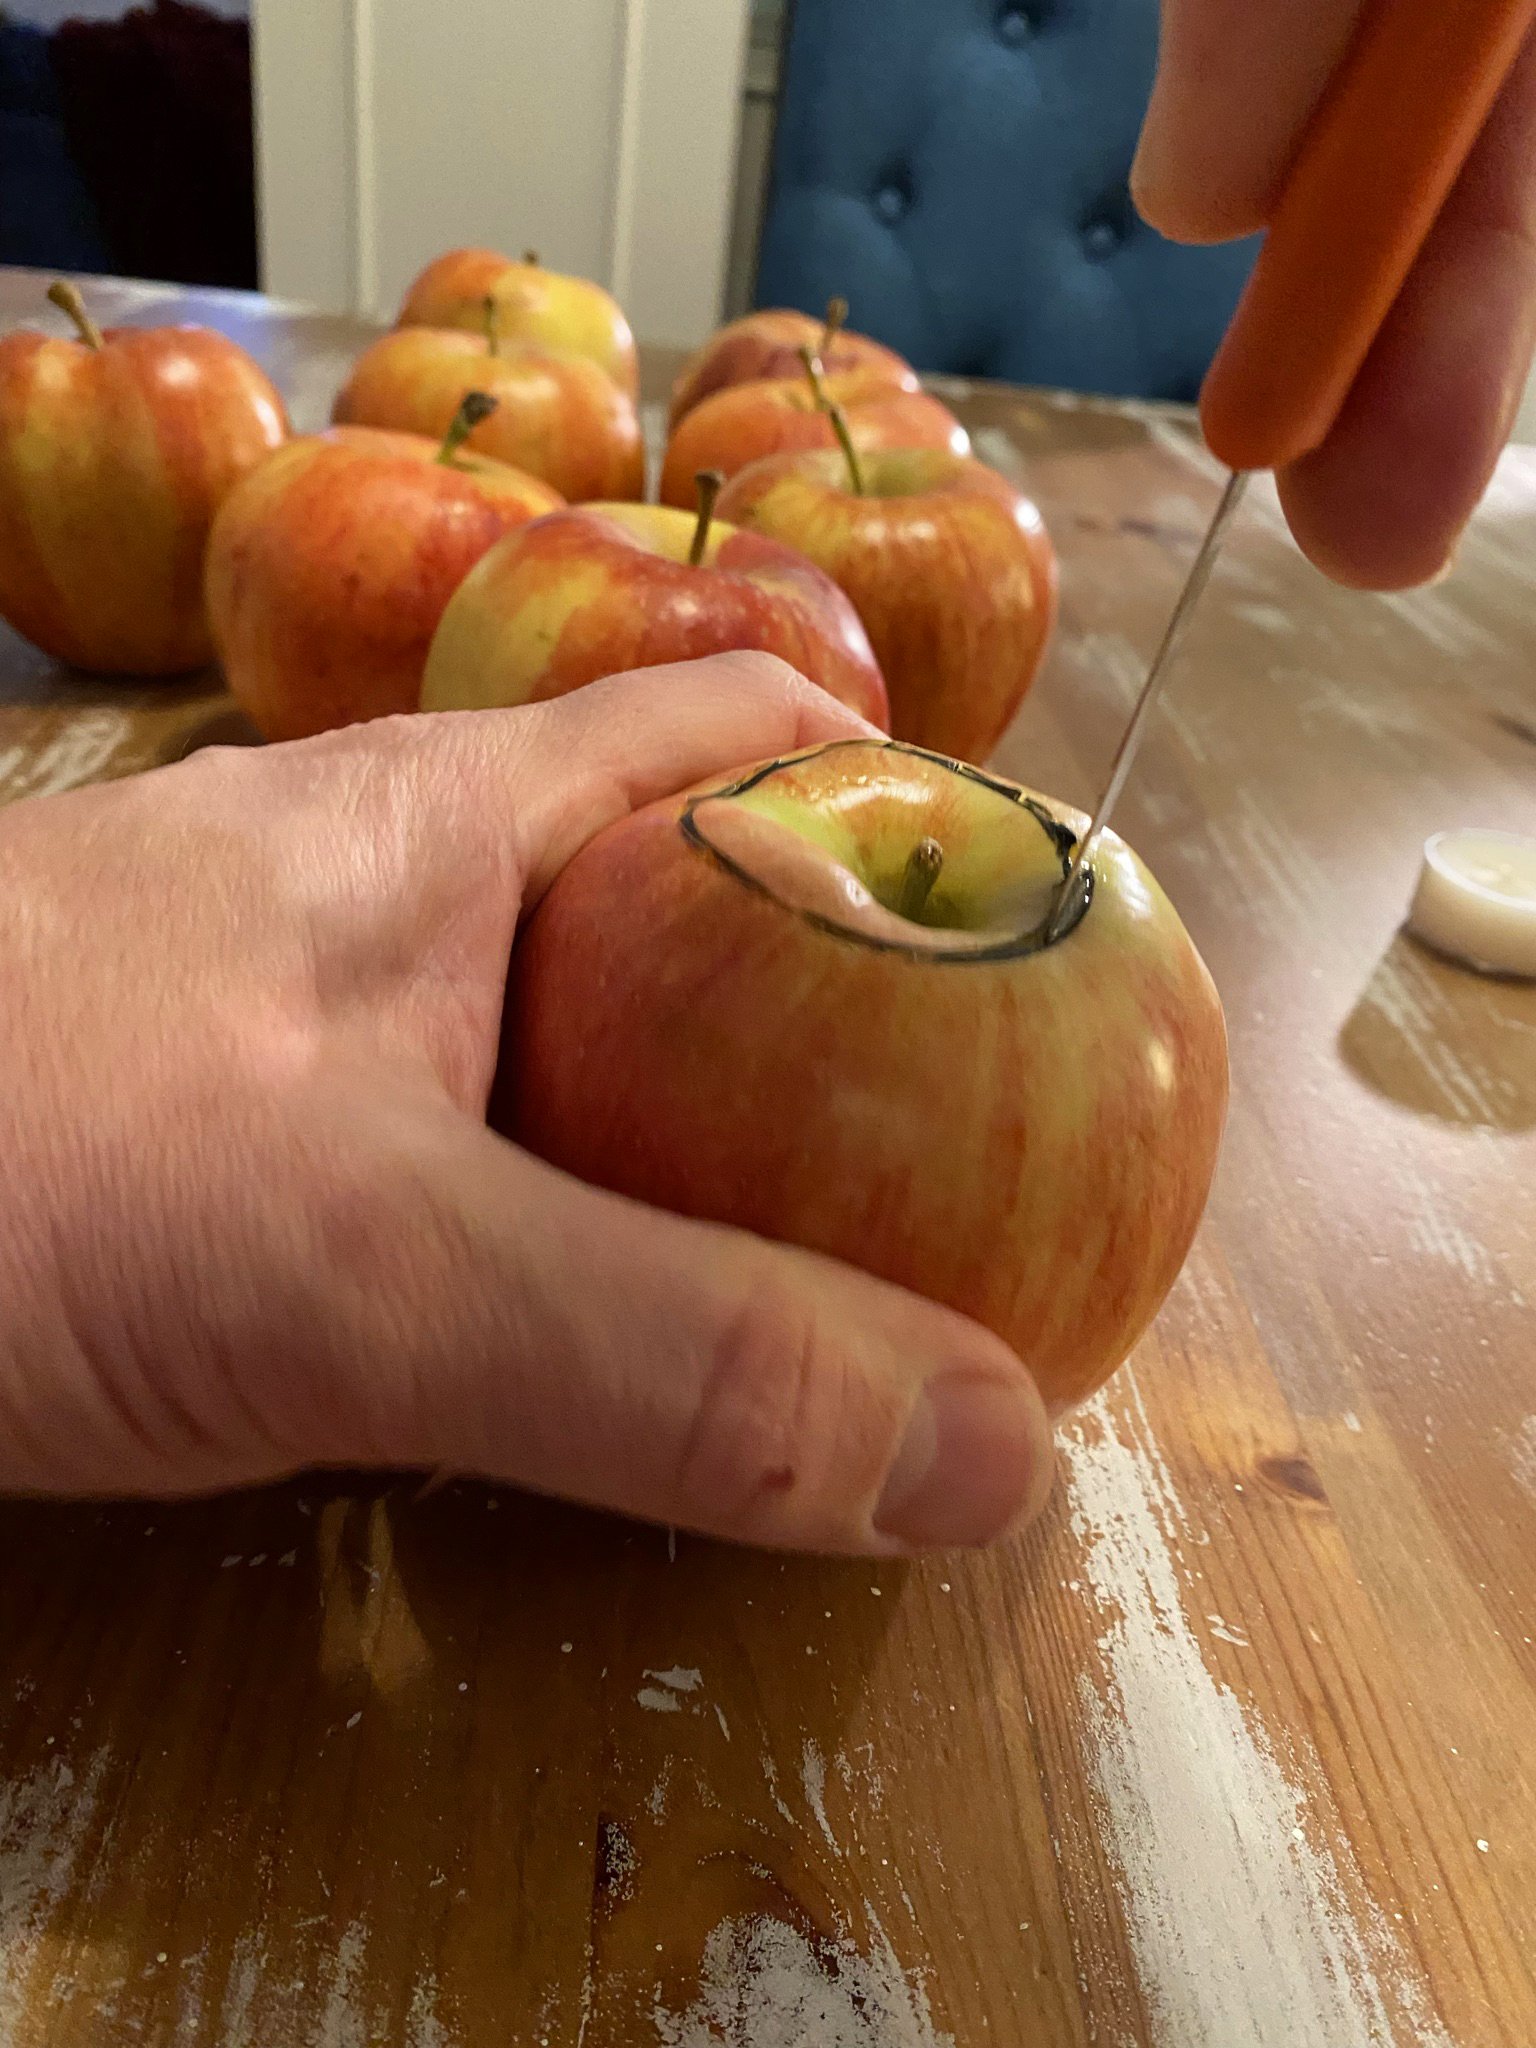
Step 3
Use the paring knife to cut around the traced circle. Note: Cut along the inside edge of the circle for the best fit. Also, make sure to cut in the apple only as deep as the height of the votive candle. You can either eyeball this or since we were using a dry erase maker, we drew a line on the paring knife at the height of the candle as a guide.

Step 4
Once done cutting, use the spoon to scoop out the rest, scooping along the cuts.

Step 5
Use the scissors to trim the apple’s stem.

Step 6
Place the votive inside to see if it fits, if not return to step 3 to make the opening wider or deeper.

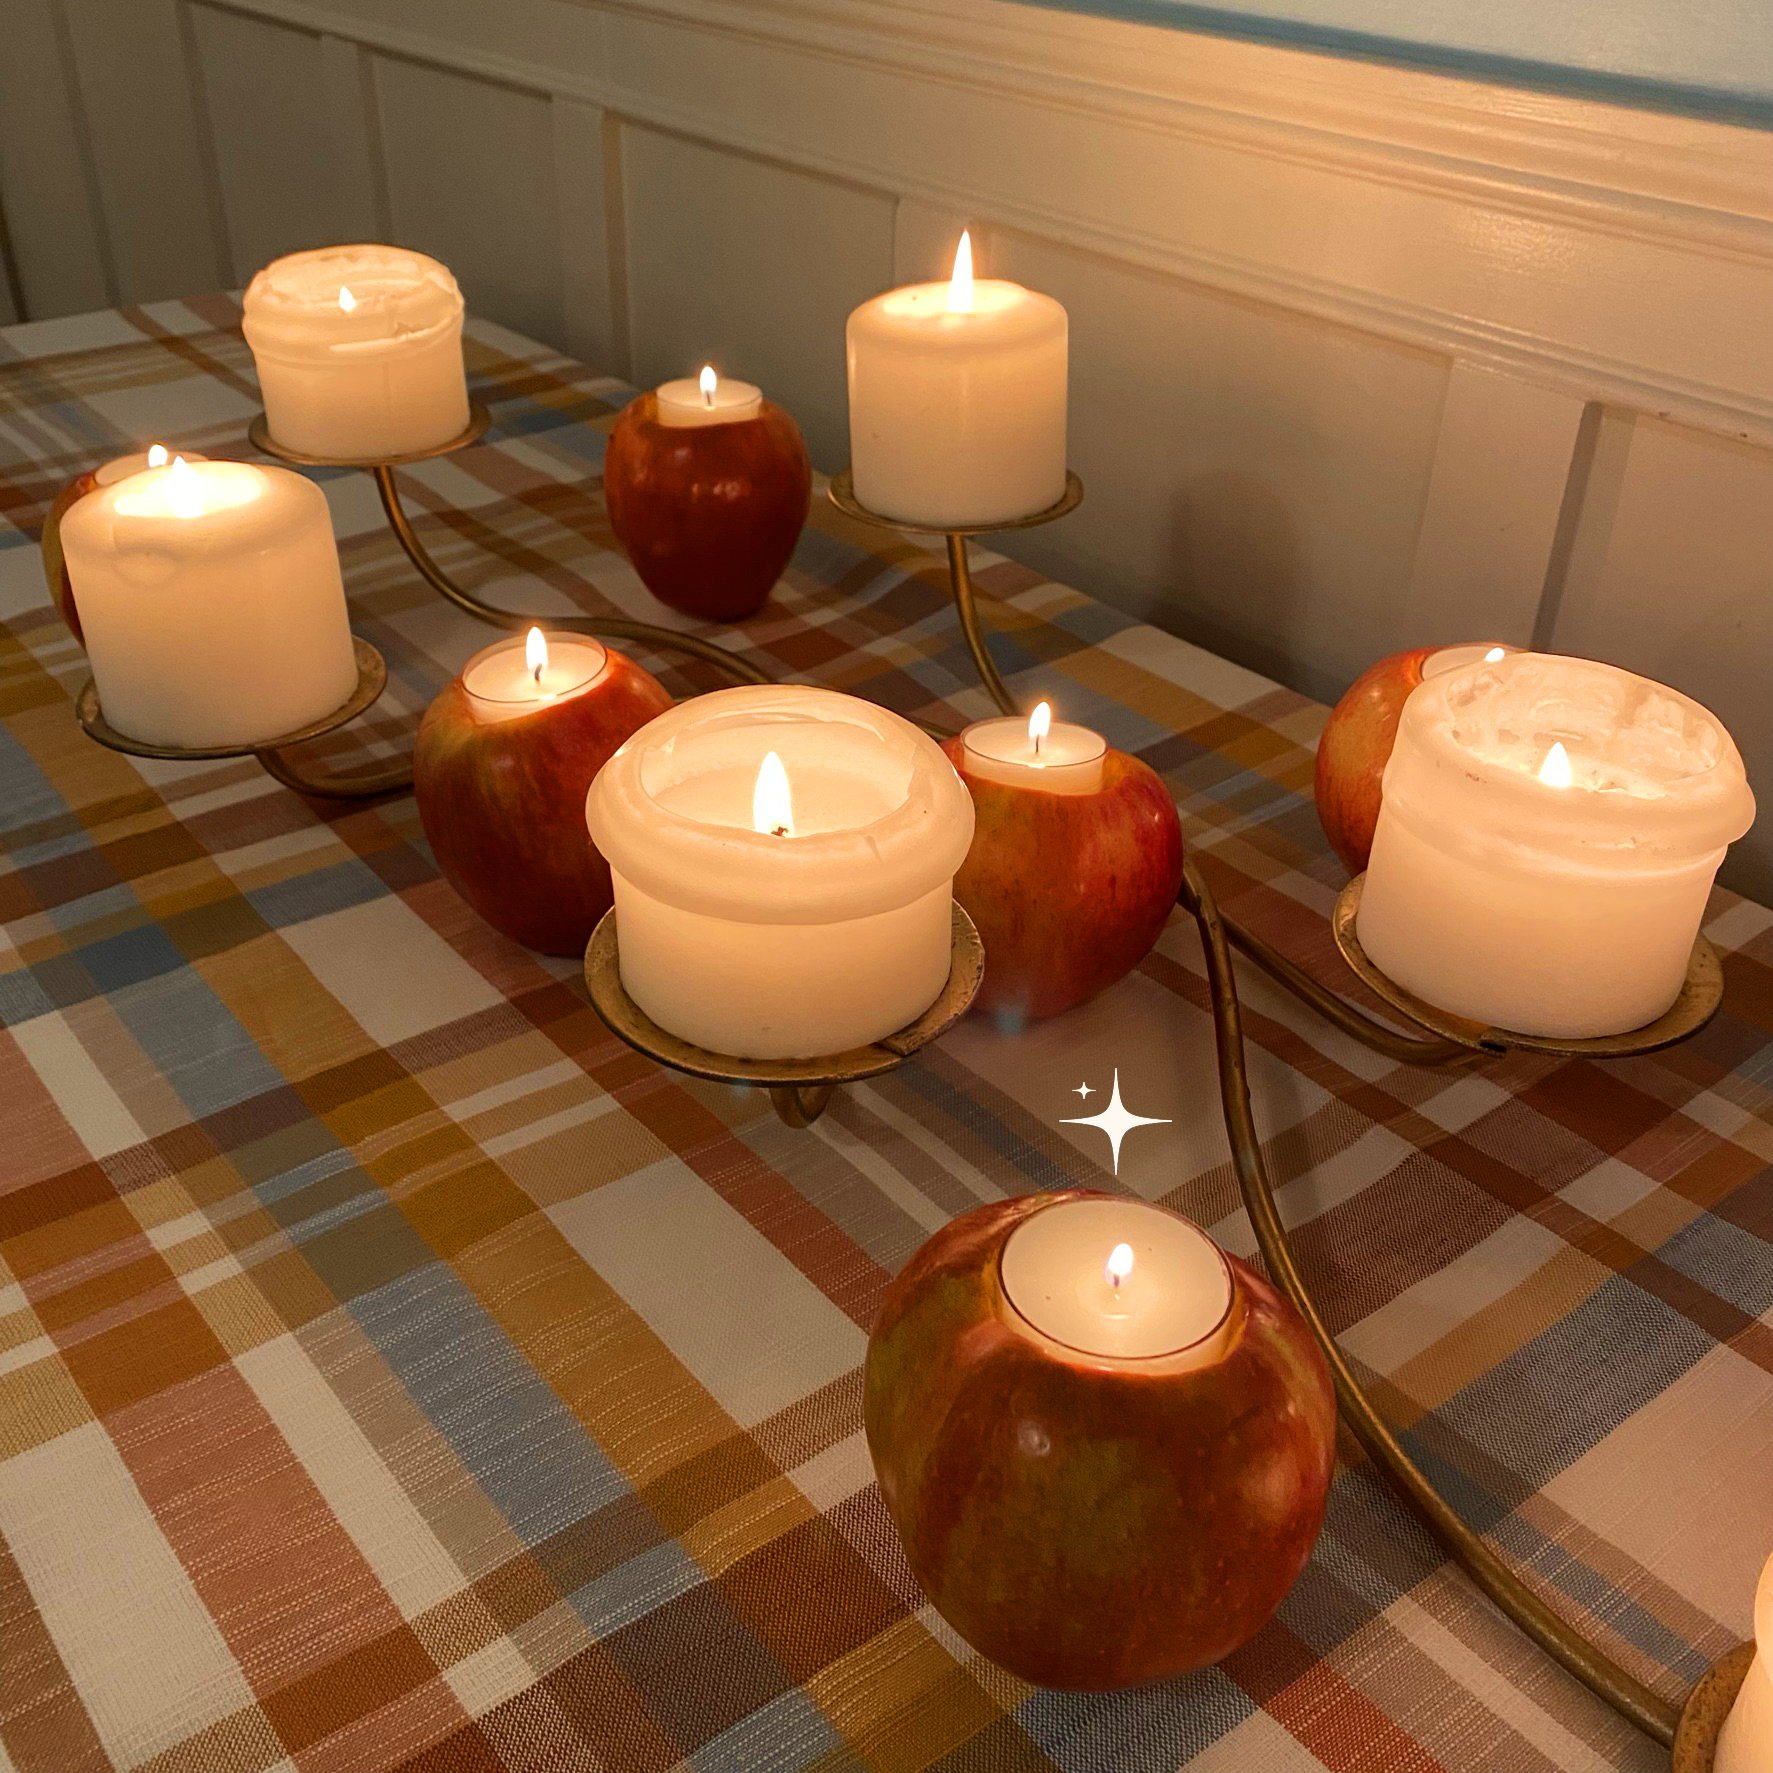
Step 7
If the votive fits, light and enjoy! For decorating, these votives pair well with our DIY pumpkin centerpiece.
Tips & Tricks
Use a dry erase marker for easy clean up and also for tracing the height of the votive onto the paring knife to use as a guide for cutting.
When making the initial cuts, use the inside edge of the traced line as a guide. Starting small (and then making it wider if necessary) ensures the best fit for the votive candle.